Customer Reviews With Photos
As I found many of the reviews very helpful (thank you), I wanted to share my experience to maybe provide a short-cut to achieve the same level of excellent coffee I've been able to get out of the siphon (after a lot of trial and error); I hope it's helpful, and again, want to thanks others for posting their experience/recommendations/suggestions: 1) It took us a few months to dial this in; here's the procedure (in detail) that produced an excellent cup of coffee (better than our Bonavita BV1900ts drip coffee maker). We roast our own coffee beans at home in a modified hot air pop corn maker [green beans provided on-line from Sweet Maria's; we like their 8 pound green bean sample pack. We roast a single batch (4.6 oz of green beans) in about 15-minutes, which is two days worth of coffee for us; it's easy and fun too]. 2) Picture - We replaced the Yama siphon cloth filter & filter assembly with the Hario paper filter & filter assembly (see the Equipment list at the bottom of this review, and the attached picture, showing the two filter assemblies, as you’ll need to switch the spring/chain assembly from the Yama cloth filter assembly (the longer chain with the cloth filer attached in the picture is the original Yama filter assembly) to this new Hario paper filter assembly, as the Hario spring/chain is a little too short,); we didn’t try the cloth filter that came with the Yama 8-Cup Siphon, as we wanted the better filtering of a paper filter (they say paper filters are suppose to minimize cafestol, a cholesterol elevating coffee compound), and secondarily, we didn’t want the hassle of the cloth filter (tying, un-tying, keeping it water in the refrigerator, etc.). 3) Weigh out the whole coffee bean (before grinding) on the scale, then place whole beans in grinder's hopper (don’t grind yet). 4) Tare your scale with the Yama siphon's empty bottom bowl on it; fill bottom bowl with hot water (we have a instant hot water tap mounted to our kitchen sink (putting out about 165 F hot water, which we love) connected to our under-the-counter reverse osmosis water filter). The water weight in ounces should be equal to the weight of the whole coffee beans (also in ounces) X 16.5 (water to coffee weight ratio); for example, we used 1.89 ounces of roasted Nicaragua coffee beans (home roasted 5.5 days prior), 31.2 ounces (by weight) water, and coarse grind (grind setting of 25 (twenty five) on the Baratza Encore grinder); the coffee looks a little coarser than sea salt. The proper grind setting is very important. We tried the recommended "a little finder than drip grind" setting and many others, but those yielded a more bitter cup; going with a coarser grind requires a longer brew time (as we include in this procedure), but yields a smoother cup. 5) Start your timer; wipe outside of lower bowl with clean, dry dish towel to make sure the outside of the lower bowl is dry (to minimize the cracking potential), then place lower bowl on a medium or small size burner on your gas stove; turn the flame on (flame to a little higher than medium). 6) While the bottom bowl of water is heating, install a new Hario paper filter (using a new paper filter vs re-using an old one seems to produce a better cup of coffee) into the filter assembly and secure filter assembly in top bowl; pre-heat top bowl with hot water (this will reduce the chances of it cracking and also pre-wets the paper filter); loosely place top bowl on bottom bowl (which is on the stove) at angle (not on tight yet). 7) When the timer reaches 4:00 (depending on your stove), fully insert top bowl into bottom bowl (bottom bowl temp should be around 200 F; the water should look like it is at a simmer, just getting ready to boil); once the top bowl in inserted, water will start to rise into top bowl right away, but as it does, turn down flame (to low, want just enough flame to keep water in top bowl without a lot of bubbling, which tends to over-extract the coffee), then place upside down plastic lid on top bowl (in the upside down position, meaning with open part facing up, otherwise condensation will form, catch in the underside lip, and drip down to the bottom bowl, which could potently cause it to break); placing the lid in the upside down also allows you to use the small round cylinder as handle, while minimizing heat loss from the upper bowl. 8) Start the grinder and grind the coffee beans (coarse grind). 9) Once the grinder is finished, take the coffee container over to the siphon (don't add it yet); stir the water in upper bowl counter clockwise (CCW) with a flat paddle (like the flat handle part of the plastic spoon that came with the Yama siphon) to make a fast and deep vortex (so about 6 full circle stirs). 10) Reset the timer and re-start the timer from zero, 0:00, then add ground coffee to upper bowl (to get all the coffee out of the container, do not tap coffee container against upper bowl, use your knuckles or other utensil to tap all the coffee out of the container). 11) Use a whisk to lightly submerge coffee grounds (within 15 seconds or so), do not stir (in a circular fashion, just submerge the grounds to get them all wet); timer should be at around 0:30 when done pouring coffee in top and whisking; put upside down lid on top bowl. 12) At 0:50, using flat paddle (you're done with the whisk), fold coffee into water from sides of bowl with a downward motion, not a circular stir; go around the entire bowl, then do an “N” stir in the middle (make the letter N with your paddle, going deep, across the filter); do not stir in a circle or it will keep moving and over-extract; this mild agitation should take less than 15 seconds, do not over-agitate, less is better; put upside down lid on to bowl and wait. 13) At 2:00, shut off flame, move siphon to counter top (on top of flat rubber-type pot holder), make sure top bowl is tightly on bottom bowl (by gently pushing it down using a pot holder), then give it a fast stir CCW (6 rotations), making sure to also go deep with the paddle to stir the grounds up off the top of filter; put upside down lid on to bowl (slightly off-center, so as to not restrict air that will need to flow into the top bowl during the drawdown) and leave undisturbed during the drawdown. 14) At 4:30, you should see the larger bubbles in the bottom bowl; at this point the drawdown is finished, however, it will take about another 30 seconds before you can easily remove the top bowl. The coffee grounds should be in a mound over the filter when it's done, but some will be along bottom too; however, we found that coffee not as fresh (or store bough pre-roasted whole bean coffee) draws down faster and the mounding is more pronounced. 15) At 5:00, take the siphon and move it near the sink; put it on top of rubber-type pot holder; gently rock the top and use your thumb (from the hand hold the siphon handle on the lower bowl) to pry up the top bowl at an angle to let air into the bottom bowl to relieve the vacuum; remove the top bowl and place it into the holder/lid on the counter, in a safe area to cool (where it won’t get knocked over and break). 16) Swirl the coffee in the bottom bowl; transfer it into a large pre-heated non-plastic coffee mug and put the lid on the mug (a plastic mug lid is okay, as you won’t be drinking through it); as desired, add any pre-heated creamer/half-and-half and/or sweetener to the mug, stir, then put the lid on the mug; don’t drink yet, as this is your coffee “storage mug,” not your coffee “drinking mug,” see below. 17) This last step is very important; please don’t skip it. The coffee is too hot to enjoy from the storage mug, and more importantly, drinking it though the mug lid does not allow you to get the full enjoyment (as you need the coffee aroma flow up into your nose), so we pour the coffee from the mug (through its lid) into a second, drinking mug (like a ceramic coffee cup or stainless steel coffee mug) and make sure when we sip it, it’s uncovered, not through any lid (we sometimes cover the second mug between sips, depending on how fast we’re drinking it, but always take the lid off to drink/sip the coffee). Only add as much coffee from the first mug into the second mug as you’ll drink over the next few minutes so you’ll always enjoy hot (but not too hot) coffee. Thanks again to all the other folks that took time to write reviews! Enjoy! 18) Equipment (all from coffeemakers.us.com.com): a. Coffee Siphon - Yama Glass 8 Cup Stovetop Coffee Siphon; $55 b. Siphon filter assembly and paper filters - 1 X (50 Pcs Filter Paper) Mn Filter for Hario Siphon(Japan Import); $15 c. Grinder - Baratza Encore Conical Burr Coffee Grinder with Bin; $129 d. Coffee Storage Mug - Contigo Autoseal West Loop Stainless Steel Travel Mug with Easy-Clean Lid, 20 oz; $22 e. Etekcity 2000g Digital Pocket Scale, Stainless Steel, Backlit Display, 0.01oz Resolution; $15
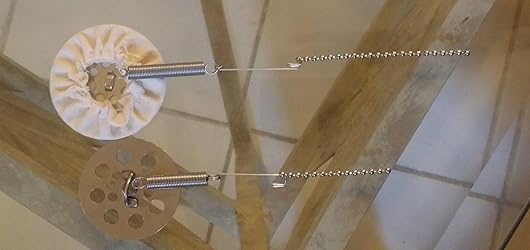
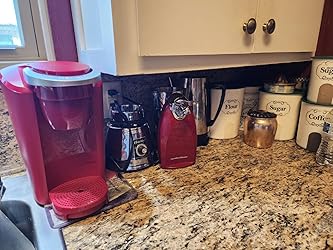
This machine makes a hot cup of coffee, yes, but not true to sizes listed. Unless you push the button for the largest size, you won't get much of a cup. Also, quite a large machine, and takes up a lot of space on the counter, and doesn't fit under cabinets. Would've returned, but husband threw out the box. So, dealing with it 🙄
The machine was not clean and sanitized. Very disappointed in purchase. Returned and purchased a different product.
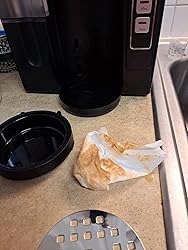
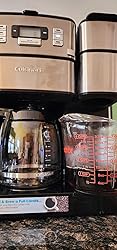
We wanted to go from a Keurig to a combo machine. We are disappointed. We plan to return this and go back to shopping. The pod brewer is poorly calibrated so it only makes watery coffee. The photo shows what you get when you try for an 8 oz cup, which is the size the pods are designed to make. With just plain water, no grounds to soak up some, every setting is 4 oz too much. That's a huge error and inexcusable for +$200. There is also no option for "bold" on the pod side and it just is a pointless cost driver for the machine. We love how quickly the grind and brew side cleans up, and initially we thought we could find a way to live with this machine. We also really like the Bold setting, which slows down the drip and gives more water-to-coffee contact for more extraction. However, much like the pod side, it does not do what it claims. The instructions with the brewer tell you to use 1 TBSP per cup. That direction is 1/2 the amount that any simple web search will tell you. Even the bags of beans you buy will tell you 2 TBSP per cup. That means this thing can NEVER make a full 12 cups. The instructions tell you not to use more than 14 scoops, which are 1 TBSP each. That means the most you can make, according to the vast amount of consensus on good coffee, is about 7 cups. Following the usual advice of 2 TBSP per cup, the flavor was great. If you like your coffee weaker, I guess you can drive it to 12. We tried following the Cuisinart directions but found the resulting coffee to be watery and just not enjoyable.
I was very disappointed with the size and condition of this product. It was much smaller than I expected and though it was packaged and packed very securely the outside double liner had a dent in the side. Not what I was expecting, especially for the high price.

Very stylish and functional. Easy to use and clean. Comes with the necessary attachments for ground coffee or pods.
This came broken, dirty and missing parts!
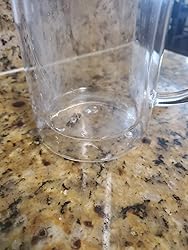
Bought press last month,used twice and only hand washed but noticed water inside the insulated glass. How did this happen. Really want to return it. Does any other press has this hole?
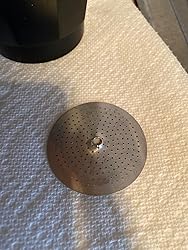
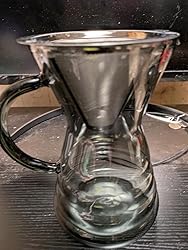
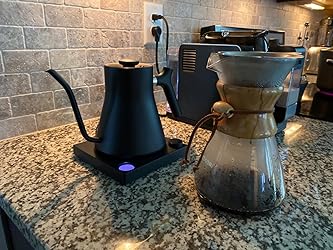
The filter seems finer then reusable mesh coffee filters we've bought in the past. I'm highly skeptical of the "unbreakable" claim. This is probably about right to serve one or two people. Should work nicely for coffee or tea. Overall we like this pot and it comes in a few different colors. We're also using this as a second stage filter for cold brew with a paper filter.
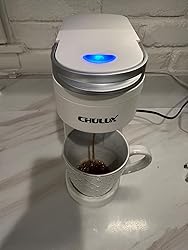
I like how compact the CHULUX coffee maker is, as it take up little counter space making it perfect for someone who lives alone as well. It heats up fairly fast and works well brewing a single cup of coffee. I would have like to have a display to choose the amount of ounces. The coffee was not too hot but I am not sure if it is because the cup was filled all the way up, I did have to empty some of the coffee to make room for milk. I probable should have put the attachment up as well to prevent som splatter with the shorter cup. It did brew a good cup I have to take another look at the instructions to make sure everything is working good.
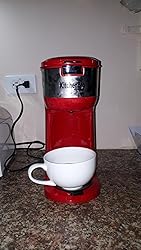
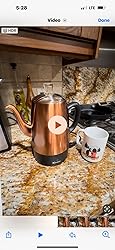
Got tired of the Keurig not getting hot enough and the price. Decided to go back to the old school way of making coffee. I really like the color. The coffee maker works great and gets hot. The only problem is the coffee grinds sometimes get in the coffee. I guess I could buy a filter and try it
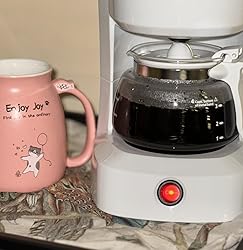
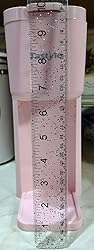
Loving the tasty hot coffee this sweet little pink Tastyle coffee maker produces! You can tell by the huge flavor that is brewed into your up to 14 oz cup that without measuring temperature but gauging by taste, this maker is on the money brewing at the perfect temperature to release all the complex flavors in the Starbucks ground dark beans that I am known to choose as my fave! I've been enjoying using k-cups with the adapter for the pods and really enamored with the ease of use and cleaning of the ground coffee adapter pod! The ground coffee pod works way better than any others I've tried in the past, not messy at all, very minute amount of coffee dust left in the brewer, easily wipes clean with paper towel. I like that this is not a complex machine, for instance, you are the one that determines the amount of water to put thru the machine, not a button selecting a choice. You manually add the amount of water to the reservoir, to the fill line that works for you, between 6 & 14 oz. Sometimes I brew coffee into a mug say 10 oz worth, and with same pod in place add additional 6l oz. of water to run thru to bring the coffee brewed to around 16 oz or so, to fill a big travel mug. I feel it's worth the minimal extra effort, as this little maker can be dried out between uses and cleans up quickly, mostly with a paper towel. I for one, find coffee maker reservoirs that are wet all the time a bit "gamey," if you follow, bacteria breeding grounds, so this works out better for my likes. This maker is a great machine for the money and is mostly quiet, except for a slight steam or gurgle noise, funny kind of! You can without a doubt grab and go with this pastel pink coffee maker, slide it right into a tote bag, back pack, portability at it's finest! This can also make you some cold brewed coffee, as much as I enjoy coffee, ice coffee is not on my agenda, don't care for it! But the option is on the machine should you wish to do some ice coffee up! The machine is quick and very good. This is absolutely ideal for gifting for one's dorm, small counterspace kitchen, boat, RV, campsite and on the run. A wonderful and smart & very enjoyable purchase of a whimsical looking and fantastic machine!
Works great. Easy to clean. Coffee taste awesome. I like that the filter is stainless steel. You don’t have to buy paper filters.
The filter part broke within 8 months of using… it started bending about 6 months in and then the small knob broke.